TL;DR
A closet can serve as a surprisingly effective vocal booth if you focus on strategic placement and targeted dampening. Moving the rig out of earshot and sealing gaps matter more than foam, and proper ventilation keeps your high-power rig cool.
Ever wondered why some closet setups sound surprisingly good for recording or AI work? It’s not just about slapping foam on the walls, as explained in Acoustic Dampening, Placement, and the “Rig in the Closet” Setup. The real magic lies in where you place your gear, how you treat reflections, and keeping heat and noise out. Think of your closet as a blank canvas — with the right placement and treatment, it becomes a mini studio or a quiet haven for your high-performance rig. You can learn more about acoustic dampening and placement here.
In this guide, you’ll learn the smart strategies that turn a cramped closet into a sound-optimized space. From understanding the difference between dampening and soundproofing to practical tips on mic placement and ventilation — you’ll get actionable ideas to make your setup quieter, clearer, and more efficient.
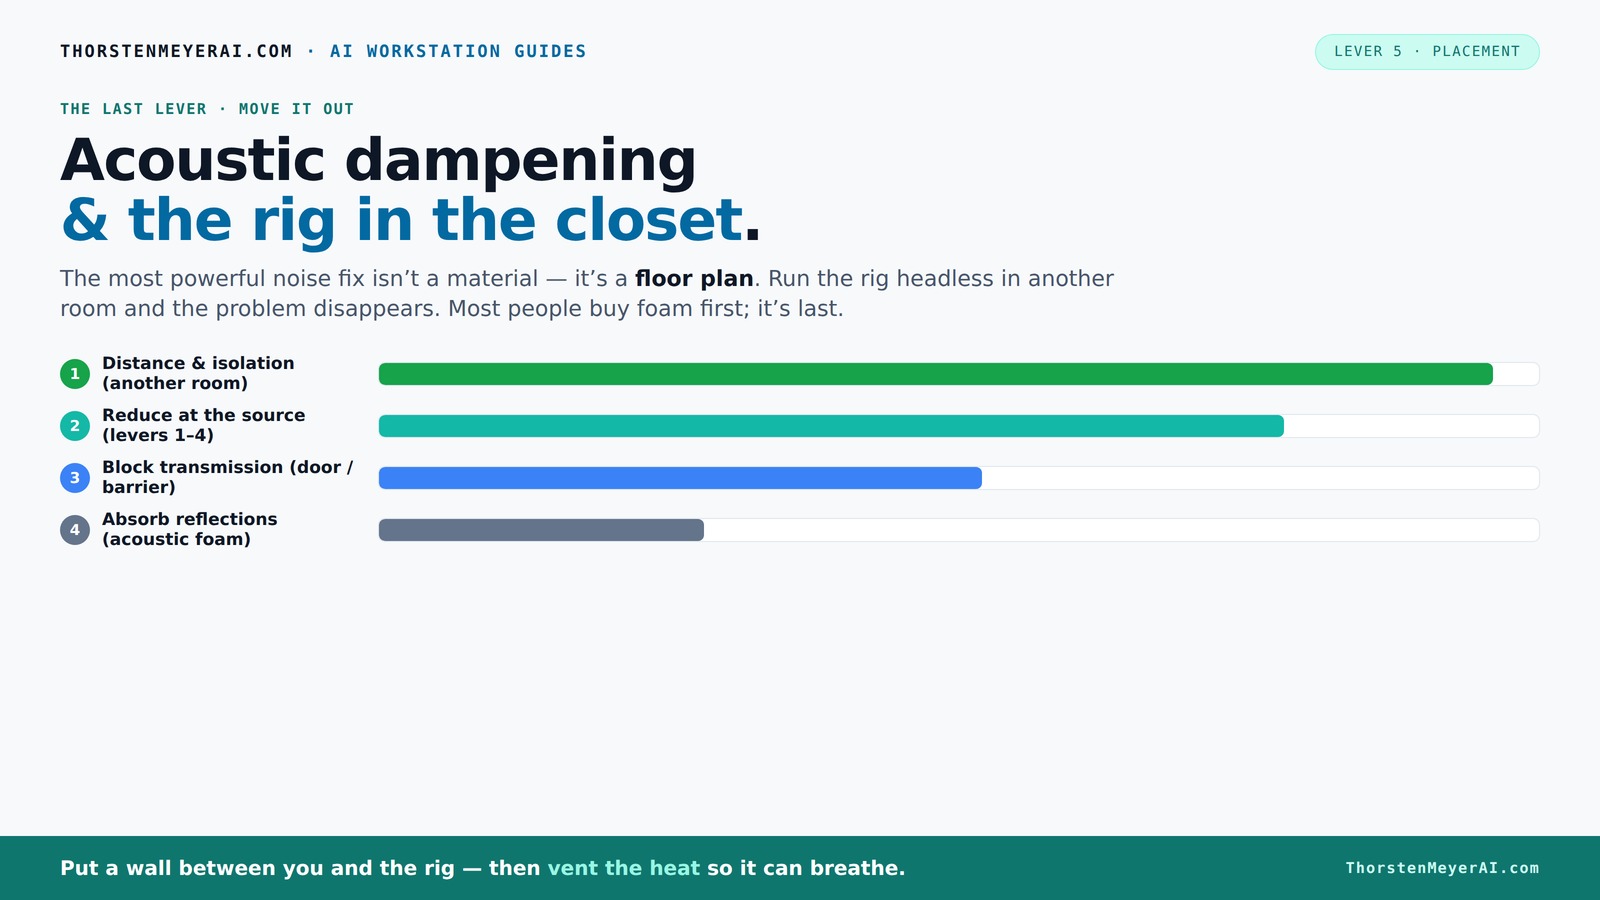
Acoustic dampening
& the rig in the closet.
The most powerful noise fix isn’t a material — it’s a floor plan. A rig you can’t hear because it’s in another room beats any amount of foam. Tap the approaches in Part 1 to see what actually works.
(another room)
(levers 1–4)
(door / barrier)
(acoustic foam)
Contain the noise, not the heat
Key Takeaways
- Moving your rig into a different room or closet drastically reduces noise and heat issues without relying solely on dampening treatments.
- Focus on sealing gaps around doors and vents; small cracks leak a lot of sound and heat.
- Treat the first reflection points — walls, ceiling, and behind the mic — with foam or blankets for clearer recordings.
- Install bass traps in corners to prevent low-end buildup, especially in small, parallel-walled closets.
- Ensure proper ventilation with quiet fans or ducting to keep your high-power rig cool without noise pollution.

Focusound 52 Pack Acoustic Foam Panels 1" x 12" x 12" Sound Proof Foam Panles Soundproofing Noise Cancelling Wedge Panels for Home Office Recoding Studio with 300PCS Double-Side Adhesive
Soundproofing - Acoustic foam panels triangular grooves structure for better noise absorption, helps to reduce and absorb unwanted...
As an affiliate, we earn on qualifying purchases.
As an affiliate, we earn on qualifying purchases.
Why Your Closet Can Be a Game-Changer for Sound and Heat
Moving your rig into a closet isn’t just about hiding noise; it’s about controlling how sound moves and how heat dissipates. When your GPU runs at full throttle, it pushes out 600W+ of heat, which can turn a small space into a sauna if unventilated. But it’s also an ideal spot for sound dampening because it’s naturally enclosed.
Think of your closet as a mini sound chamber. It traps reflections — which is good for vocals when treated right — but also can cause low-frequency buildup. That’s why treating it with bass traps and sealing gaps is key. The secret is: you don’t need to fully soundproof it — you just need to manage reflections and heat.
According to recent DIY closet booth guides, a well-sealed, ventilated closet can cut echo and reverb by 50-70%, turning a noisy room into a quiet, focused space. For more detailed tips, see this guide on acoustic treatment. Plus, you can keep your rig in another room, while still accessing it over the network, making noise and heat less of a concern.

Portable Recording Booth for Home Studio, Foldable Sound Isolation Vocal Shield with Floor Stand, High-Density Acoustic Blanket Enclosure for Singing, Voiceover & Podcast, Includes Phone Holder
INSTANT STUDIO-QUALITY "DRY" SOUND: Transform any noisy room into a professional vocal booth instantly. Engineered with high-density acoustic...
As an affiliate, we earn on qualifying purchases.
As an affiliate, we earn on qualifying purchases.
The Big Difference: Dampening vs. Soundproofing — What You Need to Know
Acoustic dampening and soundproofing aren’t the same, but they often get lumped together. Dampening — achieved with foam and soft materials — reduces reflections and echoes inside the space. Soundproofing — involving sealing gaps and using dense barriers — blocks sound from escaping or entering.
For a closet, focus on dampening to prevent echoes, and add door seals or weatherstripping for soundproofing. For example, a blanket over the door helps with dampening, but sealing gaps around the door frame blocks leaks. Combining both gives you a clean, controlled sound environment.
According to soundproofing experts, sealing even small cracks reduces noise leakage by up to 80%, making your closet a much better vocal booth or quiet room.
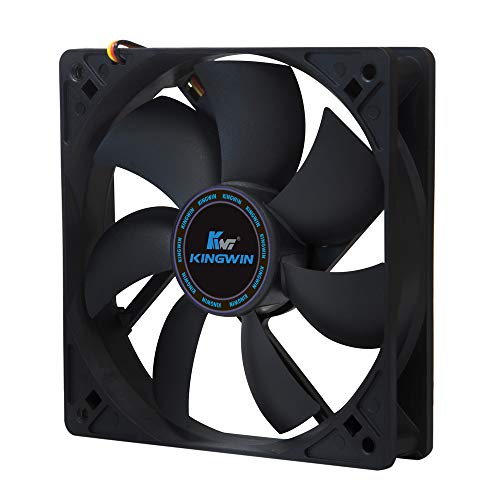
Kingwin 120mm Silent Fan for PC Cases, CPU Coolers, Mining Rigs – Quiet Computer Cooling Fan with Long Life Sleeve Bearing, High Airflow Ventilation – Black CF-012LB
special high profile fan blades for maximum air flow
As an affiliate, we earn on qualifying purchases.
As an affiliate, we earn on qualifying purchases.
Perfect Placement: How to Position Your Mic and Gear for Clear Sound
Placement matters more than most people realize. For expert tips, visit Left Brain Marketing. Start by identifying your primary sound source and where reflections bounce back. Place your mic at least a foot away from walls, aiming for the first reflection point — the spot where sound from your voice hits the wall and bounces back into the mic.
For example, if you’re recording vocals, position the mic slightly above and in front of your mouth, pointing toward your nose. Use a reflection filter or shield behind it to absorb sound. Additionally, treat the walls closest to the mic, especially the sidewalls and ceiling, with foam or blankets.
Pro tip: Use a mirror to find the reflection points. Sit in your normal position and look for where the mic sees the wall — that’s where treatment should go.

2 Pack Studio Monitor Isolation Pads for Speakers 3-5 Inches Sound Insulation Studio Foam Prevents Vibrations Acoustic Speaker Isolation Pad High Density Fits Most Stands
Enhanced Sound Clarity: Saiqiang speaker isolation pads can reduce vibrations and resonance, providing cleaner, more accurate sound from...
As an affiliate, we earn on qualifying purchases.
As an affiliate, we earn on qualifying purchases.
Targeting Low-End and Corners: Bass Traps and Corner Treatments
Small closets often face low-frequency issues. The bass can build up in corners, creating a boomy, muddy sound. To fix this, install bass traps or thicker absorption panels in the corners where walls meet. Think of it like padding the edges of a box to stop low-end rumble from bouncing around.
For instance, a DIY approach could be stacking thick blankets or purchasing foam bass traps. If your closet has parallel walls, low-end buildup is more likely, so treat those areas specifically.
Recent studies show that treating just the corners can reduce low-end resonance by up to 45%, making your recordings clearer and more balanced.
Sealing the Gaps: Keep Sound in (or Out) with Weatherstripping and Sealant
Gaps around the door or vents are like open windows for sound leaks. Sealing these with weatherstripping, acoustic sealant, or draft stoppers makes a big difference. For example, a strip of foam weatherstripping around your closet door can cut sound leakage by half.
If you notice sound escaping through cracks, apply acoustic sealant or mount a heavy curtain over the door. These simple fixes are cheap and effective at creating a tighter barrier.
Experts recommend paying special attention to the door frame, vents, and any cable entry points — sealing these reduces ambient noise and prevents sound from escaping or entering.
Floor and Ceiling: Soft Materials for Echo & Reflection Control
Don’t forget the surfaces above and below. A thick rug or moving blanket on the floor absorbs slap echoes and reduces sound bouncing around. For the ceiling, hanging foam panels or a suspended soft cloth can tame reflections that make the space sound boxy.
Imagine stepping onto a plush carpet instead of a hard, echo-prone concrete floor. That soft layer cuts down on harsh reflections, improving clarity.
Adding soft materials here can reduce reverb by 40-60%, according to recent DIY acoustic tests, making your recordings or voice work much cleaner.
Ventilation & Heat: Keep It Cool Without Noise
Running a high-power rig in a closet means managing heat without turning it into a noisy exhaust fan mess. Find ventilation tips at Ira For Gold. The key is active ventilation — a quiet exhaust fan paired with ducting or vent holes ensures hot air escapes, keeping your hardware cool.
For example, install a small, energy-efficient fan that pulls hot air out while drawing in cooler air from outside. Using a ducted vent system with sound dampening materials can reduce noise by up to 30 dB.
According to cooling experts, a properly ventilated closet prevents thermal throttling and keeps your rig running smoothly, while also avoiding loud fan noise.
DIY vs. Professional: Building Your Closet Booth for Sound & Heat
DIY solutions include blankets, foam panels, and homemade mounting rigs — cheap, flexible, and quick. For example, hanging quilts on a curtain rod or stacking foam tiles in the corners can cut echo and noise effectively.
Alternatively, semi-permanent solutions like custom soundproof cabinets or vented enclosures are more expensive but provide better control over heat and sound. These often include built-in fans, sealed panels, and acoustic lining.
Recent trends favor hybrid setups: DIY treatment combined with strategic ventilation and sealing for a cost-effective yet professional result.
Frequently Asked Questions
Is a closet enough for vocal recording?
Yes, a closet can be a great vocal booth if you treat the walls for reflection, seal gaps around the door, and control low-end buildup with bass traps. Keep in mind, it won’t block all outside noise, but it significantly improves sound quality.What’s the difference between acoustic dampening and soundproofing?
Dampening reduces echoes and reflections inside a space with foam or soft materials, while soundproofing blocks sound from escaping or entering the room with barriers and sealing gaps. For a closet, both are important but serve different purposes.Where should I place foam panels for best effect?
Place foam panels at the first reflection points — the sidewalls, ceiling, and behind the mic. Use a mirror to find these spots, and add bass traps in the corners to handle low frequencies.Do I need bass traps in a small closet?
Yes, if you notice a boomy or muddy sound, especially in the low end. Bass traps in the corners help absorb low-frequency resonances and prevent low-end buildup.How should I ventilate a closet rig without noise?
Use a quiet exhaust fan with ducting or venting to draw hot air out. Incorporate sound dampening materials in the duct or vent system. This keeps your rig cool and quiet, preventing thermal throttling.Conclusion
Turning a closet into a quiet, productive space isn’t about slapping foam on the walls. It’s about smart placement, sealing gaps, and managing heat effectively. When you treat reflections and keep your rig cool, you create a space that’s both silent and safe for continuous operation.
Remember: a little planning and some DIY know-how turn cramped closets into your best recording or AI workspaces. So, next time you think about noise, think beyond foam — think distance, seal, and ventilation. Your ears — and your hardware — will thank you.